When investigating complex issues or sharing insights with your team, you often find yourself jumping between different tools, copying queries, taking screenshots, and struggling to maintain context as you piece together a complete story from your data. Traditional dashboards are great for monitoring, but they fall short when you need to document investigations, create detailed post-mortems, or build step-by-step analytical workflows.
Notebooks solve this problem by providing a dynamic and organized way to tell a complete story with your data. They are structured, data-driven documents that let you combine queries, visualizations, and descriptive text into a single, shareable asset, eliminating the need to switch between multiple tools or lose important context during your analysis.
Use cases
Use notebooks to improve your workflow and turn raw data into actionable stories:
- Query, analyze, and visualize data: Query all your observability data (logs, metrics, events) and create visualizations to gain a better understanding of your system's performance.
- Create post-mortems and alert event documents: Collaborate with your team to document investigations and create a clear, reusable record for alert event post-mortems and root cause analysis.
- Build reusable workflows and runbooks: Create and share step-by-step guides for complex analysis.
- Add context and narrative: Use Markdown to easily add detailed titles, notes, and explanations to your queries and charts, transforming disconnected data points into a cohesive story.
Get started with notebooks
Now that you understand the basics of notebooks, you're ready to start creating and managing your own notebooks.
Access notebooks
To access notebooks:
- Go to one.newrelic.com.
- Open the Query your data console from the drawer at the bottom of the page.
- Click Notebooks in the query builder header to see a list of all notebooks created by your organization.
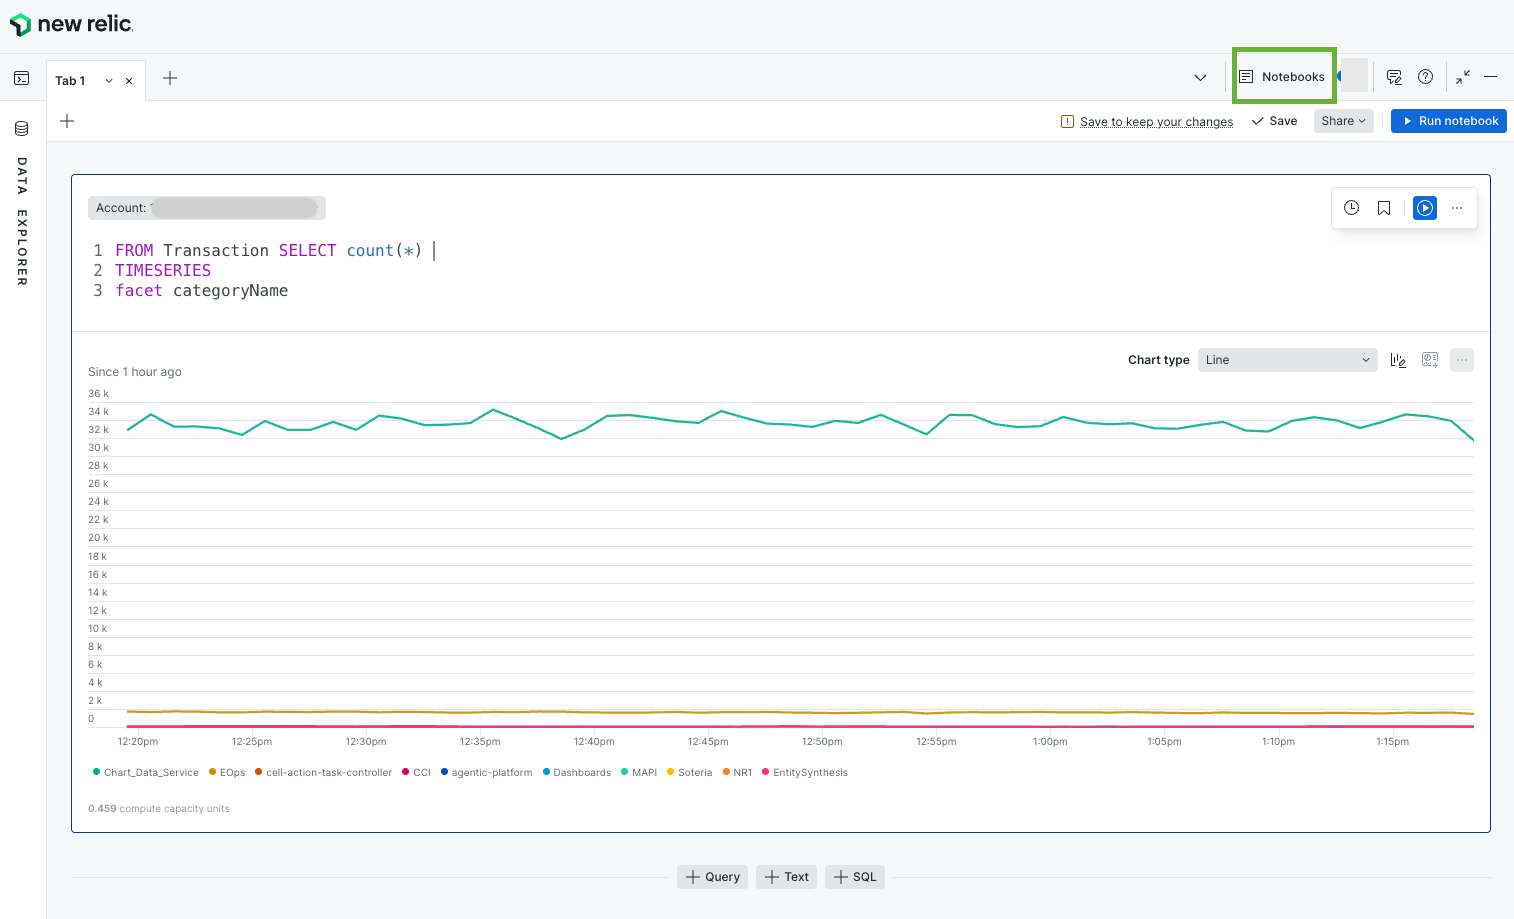
Navigate to notebooks by going to Query your data > Notebooks
Notebook blocks
Blocks are the fundamental building units of a notebook. They are individual sections you add to structure your analysis and narrative.
Query blocks
Use query blocks to write NRQL queries and visualize the results. All single query chart types and customizations available in the standard query builder are supported in notebooks.
Text blocks
Use Markdown to add rich text, titles, context, explanations, and descriptive text to tell the story of your investigation.
Block actions
Every block can be manipulated to organize your document:
- Duplicate: Create a copy of the block
- Delete: Remove the block from your notebook
- Move Up/Down: Reorder blocks within your notebook
- Move to Top/Bottom: Quickly move blocks to the beginning or end
Notebooks permissions
Before you start creating notebooks, it's important to understand how permissions work and who will have access to your notebooks.
Organization association
Every notebook is a resource that belongs to the organization in which it was created. This association is permanent and cannot be changed. Notebooks cannot be shared between different organizations. If the organization is deleted, the notebook is deleted as well. If a user moves to a different organization, they will not have access to notebooks from their previous organization.
Current permissions model
New Relic Notebooks uses custom roles with CRUD capabilities to control access. There are two levels of access: organization-level (set by an admin) and notebook-level (set per notebook by its creator).
Organization-level permissions
These are granted via custom roles in the New Relic admin UI.
Role | Capabilities | What it allows |
|---|---|---|
Full access |
| Create, read, edit, and delete any notebook in the org |
Creator |
| Create new notebooks (own notebooks only) |
Notebook-level roles
These are assigned on a specific notebook, typically by the notebook's creator.
Role | Permission | What it allows |
|---|---|---|
Owner |
| Read, edit, delete, and manage permissions — automatically assigned to the creator |
Editor |
| Edit the notebook |
Reader |
| View the notebook (read-only) |
How it works together
- An admin gives a user the Creator org-level role — this lets them create notebooks.
- When a user creates a notebook, they automatically become its Owner.
- The owner can then share the notebook with others by granting them Editor or Reader roles on that specific notebook.
- Users who need access to all notebooks org-wide (for example, admins) get the Full access role instead.
What's next?
Now that you understand the basics of notebooks, you can:
- Learn more about blocks in notebook
- Use variables in notebooks to build dynamic, parameterized runbooks
- Manage notebooks programmatically with the Blob Storage API for notebooks
You can also explore related features:
- Dashboards for building persistent data visualizations
- Query builder for creating individual queries
- Charts for understanding visualization options