Overview
Agent Control simplifies the management of your instrumentation agents. This guide will walk you through the process of installing and uninstalling Agent Control on your Kubernetes clusters, Linux hosts, or Windows hosts using different methods.
Install Agent Control
tip
For automating Agent Control setup across large-scale infrastructure, see Set up Agent Control with Terraform.
Guided install
Log in to New Relic.
Ensure the correct account is selected.
In Integrations & Agents, click Install Agent Control or search for Agent Control.
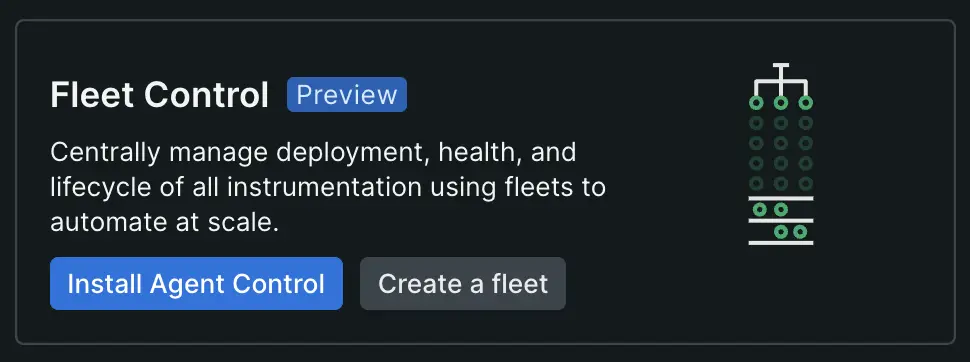
Follow the steps to complete the installation and configuration process.
Important
To install Agent Control, it is mandatory to have a fleet. If you haven't yet created a fleet for this managed entity, you can create a fleet during the installation in the Guided Install or complete the fleet creation process in Fleet Control, and then return to this guided installation step.
Fleet type requirement: Fleets are separated by type. You must select the right type for your hosts (Windows or Linux) or k8s. Using a fleet of a different type will cause installation or operation issues.
Templates and configurations in different environments may require adjustments for compatibility.
Download the generated configuration to your computer and run the provided command in your terminal to install Agent Control. After installation, click Continue.
Test the connection to confirm the installation was successful. This step may take 5-10 minutes to complete.
Now that Agent Control is installed and running, you're ready to configure and manage your agents or deploy changes to your agents using Fleet Control.
What to expect after installation
After running the installation script, Agent Control sets up the supervisor service only. No instrumentation agents are deployed automatically.
Immediate (0-2 minutes):
- 0-30 seconds: Agent Control service registers and starts
- 30-60 seconds: First connection to Fleet Control established
- 1-2 minutes: Configuration synchronization completes and host/cluster appears in Fleet Control
Important
No telemetry by default: Agent Control is a supervisor service that manages agents. It does not collect or send telemetry data itself. To see infrastructure metrics, logs, or other telemetry in New Relic, you must deploy and configure agents (such as the Infrastructure Agent) through Fleet Control after installation.
Next steps required: After Agent Control is installed and connected to Fleet Control, you must manually deploy agents to begin collecting telemetry:
- Log in to New Relic and navigate to Fleet Control
- Select your fleet and locate your host/cluster in the Entities table
- Deploy agents (Infrastructure Agent, NRDOT, etc.) to your host/cluster using Fleet Control
- Wait 5-10 minutes for deployed agents to start and send telemetry to New Relic
Migration
Existing agents: If you have the New Relic Infrastructure Agent already installed on your host, you must uninstall it before installing Agent Control. After installing Agent Control, you can manage the Infrastructure Agent by migrating your local configuration to Fleet Control. APM agents (which are not currently managed by Agent Control) can remain installed and will continue to operate independently.
Note about authentication
New Relic Control requires the use of system identities, which are non-human identities used to authenticate and establish trust between services and applications.
During the Agent Control guided installation process, the first system identity is created using client credentials, which are included in the Helm chart's values or the host command. The credentials for this system identity expire after 12 hours. When they expire, the Agent Control Helm chart deployment or host command will fail to authenticate with the Fleet Control service, resulting in the following error:
Error getting system identity auth token. The API endpoint returned 400: Expired client secret.In this case, the Helm chart or host command must be updated with new system identity credentials. Helm chart example:
global: cluster: "cluster-name" licenseKey: "*************************"agentControlDeployment: chartValues: systemIdentity: organizationId: "00000000-0000-0000-0000-000000000000" parentIdentity: clientId: "CLIENT_ID" clientSecret: "CLIENT_SECRET" config: fleet_control: fleet_id: "SAMPLE_FLEET_ID" agents: ...Advanced Kubernetes configuration
By default, the Agent Control Helm chart leverages an embedded instance of Flux CD to manage the lifecycle of your agents in Kubernetes. Depending on your ecosystem requirements, you can configure Agent Control to leverage an existing custom Flux v2 installation or bypass the continuous delivery infrastructure components entirely.
Support for existing Flux installations
By default, the Agent Control Helm chart leverages an embedded instance of Flux CD to manage the lifecycle of your agents in Kubernetes. However, if your organization already utilizes Flux v2 for GitOps, you can configure Agent Control to leverage your existing installation.
This approach decouples Agent Control from the embedded continuous delivery engine, allowing you to maintain a single Flux instance for your cluster operations while still benefiting from Agent Control's management capabilities.
Requirements and compatibility To use an external Flux installation with Agent Control, your environment must meet the following requirements. Configurations that deviate from these specifications are not validated.
- Flux Version: Flux v2 or higher.
- Required Components: Your Flux installation must include:
- Helm Controller: With the HelmRelease CRD (helm.toolkit.fluxcd.io/v2).
- Source Controller: With the HelmRepository CRD (source.toolkit.fluxcd.io/v1).
- Namespace Scope: Your Flux instance must be configured to watch the namespace where Agent Control will be installed (or configured to watch all namespaces).
Configuration To enable this mode, you must explicitly disable the bundled Flux components in the Agent Control Helm chart configuration.
In your values.yaml file, set agentControlCd.enabled to false:
global:  cluster: "<YOUR_CLUSTER_NAME>"  licenseKey: "<YOUR_LICENSE_KEY>"
# Disable the embedded Flux instanceagentControlCd:  enabled: false
agentControlDeployment: chartValues: # ... other configurations ...Permissions for external Flux When using your own Flux installation, the Flux Service Account in your cluster is responsible for applying the configurations generated by Agent Control. Therefore, your existing Flux instance requires specific permissions to deploy New Relic resources. We highly recommend one of the approaches below:
- Cluster Admin (recommended): The simplest configuration is to ensure your Flux instance runs with
cluster-adminprivileges. This is the standard configuration for the Flux community chart and ensures it can manage all necessary resources (Deployments, DaemonSets, Services, etc.) required by New Relic agents. - Least Privilege Configuration: If your security policies restrict the use of
cluster-admin, you must create a specificClusterRoleensuring your Flux Service Account has the permissions required by the Source Controller, Helm Controller, Agent Control, and every specific agent you plan to install.
Important
Note: Agent permissions may change as new features or agents are added. You are responsible for maintaining these permissions in your custom role.
Below is an example ClusterRole demonstrating the minimum permissions required for Agent Control and Flux components to interoperate:
apiVersion: rbac.authorization.k8s.io/v1kind: ClusterRolemetadata:  name: external-flux-agent-control-rolerules:  # Permissions required by Flux to operate Agent Control components  - apiGroups: ["apiextensions.k8s.io"]    resources: ["customresourcedefinitions"]    verbs: ["get"]  - apiGroups: ["coordination.k8s.io"]    resources: ["leases"]    verbs: ["get", "create", "update"]  - apiGroups: ["rbac.authorization.k8s.io"]    resources: ["clusterroles", "rolebindings"]    verbs: ["get", "create", "delete"]  - apiGroups: [""]    resources: ["configmaps"]    verbs: ["watch"]  - apiGroups: [""]    resources: ["events"]    verbs: ["create", "patch"]  - apiGroups: [""]    resources: ["namespaces"]    verbs: ["create"]  - apiGroups: [""]    resources: ["serviceaccounts"]    verbs: ["get", "create", "delete"]  - apiGroups: [""]    resources: ["services"]    verbs: ["get", "create"]  - apiGroups: ["apps"]    resources: ["deployments"]    verbs: ["create"]  - apiGroups: ["autoscaling"]    resources: ["horizontalpodautoscalers"]    verbs: ["get", "create"]  - apiGroups: ["batch"]    resources: ["jobs"]    verbs: ["get", "list", "watch", "create", "delete"]
# Permissions required by Agent Control logic - apiGroups: ["helm.toolkit.fluxcd.io", "newrelic.com", "source.toolkit.fluxcd.io"] resources: ["*"] verbs: ["*"] - apiGroups: [""] resources: ["secrets"] verbs: ["*"] - apiGroups: [""] resources: ["configmaps"] verbs: ["get", "list", "create", "patch", "update", "delete", "deletecollection"] - apiGroups: [""] resources: ["namespaces"] verbs: ["get"] - apiGroups: ["apps"] resources: ["daemonsets", "deployments", "statefulsets"] verbs: ["get", "list", "watch"]Support boundaries When using an external Flux installation, New Relic support is limited to Agent Control software (the generation of valid configuration manifests). In this mode, you have to consider a shared responsibility schema as the following:
- New Relic Responsibility: We ensure that Agent Control correctly interacts with the New Relic backend and generates valid
HelmReleaseandHelmRepositorydefinitions. - Customer Responsibility: You are responsible for the health, version maintenance, networking, and troubleshooting of your own Flux installation. Issues arising specifically from the configuration or failure of the external Flux controllers are outside the scope of Agent Control support.
Install Agent Control without Flux
You can install Agent Control without Flux when its role is limited to delivering configuration to managed agents and not installing or upgrading them. In this mode, Agent Control cannot manage agent lifecycle—it does not install or upgrade agents and only pushes configurations via Fleet Control. You are responsible for installing and upgrading Agent Control and any managed agents yourself. The primary use case is the Pipeline Control gateway: Agent Control delivers Pipeline Control gateway configuration changes.
To install Agent Control without Flux, set agentControlCd.enabled to false in your Helm values. Agent Control will not create or monitor any Flux objects.
global:  cluster: "<YOUR_CLUSTER_NAME>"  licenseKey: "<YOUR_LICENSE_KEY>"
agentControlCd:  enabled: false
agentControlDeployment: chartValues: # ... other configurations ...Important
Without Flux, Agent Control cannot install or upgrade the Pipeline Control gateway agent — you are responsible for installing and upgrading it (for example, with helm upgrade). The Agent Control chart itself is also not remotely upgradable in this configuration. To upgrade Agent Control, run helm upgrade against the same values file. To have Agent Control install and upgrade the gateway agent for you, keep Flux enabled — either with the bundled installation or with your own Flux installation.
When you install the Pipeline Control gateway through New Relic's guided install, the generated values file already sets agentControlCd.enabled: false. You do not need to edit it manually.
Access control
No extra cluster permissions needed: Because Flux is turned off in this mode, you don't need to create the large, cluster-wide ClusterRole permissions required for custom Flux setups. Agent Control stays completely contained, only needing basic permissions to read Secrets and ConfigMaps inside its own newrelic-agent-control namespace.
Verify installation
Kubernetes
Run the following commands to check the status of your pods: Agent Control installs subagents in a different namespace for security reasons. To verify that everything is working, check that the Agent Control pods are running in the
newrelic-agent-controlnamespace and the subagent pods are running in a different namespace, such asnewrelic.bash$kubectl get pods -n newrelic-agent-control # Check Agent Control pods$kubectl get pods -n newrelic # Check subagent podsLog in to New Relic, and go to Fleet Control.
Go to the Fleets page and select the fleet you chose during installation.
In the Entities table, confirm that your Kubernetes cluster appears in the list.
Verify that the instrumentation status for your cluster is healthy.
Linux
Check the status of the
newrelic-agent-controlservice:bash$sudo systemctl status newrelic-agent-controlIf the service appears in
FailedorStoppedstate, this means the agent got installed but there's an issue preventing its normal operation. Check the agent services logs usingjournalctl(or any similar Linux tool):bash$journalctl -u newrelic-agent-controlIf no insights are available, check how to run the agent in debug mode to access detailed logs to get more insight into why the service cannot be started.
If the service is not installed, try appending
--debugat the end of the CLI install command from the guided installation and run it again. This enables verbose logging for the installation script and may provide additional context explaining the error.Optionally, answer
yeswhen asked to send logs to New Relic to help troubleshooting the installation. Once submitted, logs can be accessed with the following NRQL query:SELECT * FROM Log WHERE hostname = `your-host-name`
Windows
Check the status of the
newrelic-agent-controlservice:Open PowerShell with Administrator privileges and run:
Get-Service -Name newrelic-agent-control | Format-List Status, StartTypeExpected output when healthy:
Status : RunningStartType : AutomaticVerify the Agent Control health endpoint:
Invoke-WebRequest -Uri "http://localhost:51200/status" -UseBasicParsingA healthy Agent Control should return a JSON response with
"healthy": true.Log in to New Relic, and go to Fleet Control.
Go to the Fleets page and select the fleet you chose during installation.
In the Entities table, confirm that your Windows host appears in the list.
Verify that the instrumentation status for your host is healthy.
If the Agent Control service doesn't connect to Fleet Control within 2-3 minutes, see Windows hosts troubleshooting.
Antivirus and Security Software
Windows Defender or third-party antivirus software may block Agent Control from running as a service. Before installation, add these directories to your antivirus exclusions:
C:\Program Files\New Relic\newrelic-agent-control\C:\ProgramData\New Relic\newrelic-agent-control\If Agent Control fails to start after installation and runs successfully from the command line, this indicates antivirus interference. Work with your security team to configure appropriate exceptions for New Relic executables.
Uninstall Agent Control
Kubernetes
To uninstall Agent Control from your Kubernetes cluster, run the following commands:
View installed releases
Run the following command to list all installed releases and identify the one for Agent Control:
$helm list --all-namespacesUninstall Agent Control
Replace
<RELEASE>and<NAMESPACE>with the appropriate values for your installation and environment:bash$helm uninstall <RELEASE> -n <NAMESPACE>For example:
bash$helm uninstall agent-control-bootstrap -n newrelic-agent-control
Linux hosts
Important
The uninstall process typically leaves configuration and other miscellaneous files. Stopping the service beforehand is unnecessary. The uninstall process may take several minutes. Example of assets that might not be deleted as part of the uninstallation:
- Local or remote configuration files: review and remove
/etc/newrelic-agent-controland/var/lib/newrelic-agent-controlfolders. - New Relic CLI: review and remove
/usr/bin/newrelic-clibinary.
To uninstall Agent Control from your Linux host:
Run the uninstall script:
bash$sudo sh /usr/lib/newrelic-agent-control/uninstall.shThis script will:
- Stop the
newrelic-agent-controlservice - Detect the package manager
- Execute the package manager purge so all the Agent Control files are removed from the system
- Stop the
Windows hosts
Important
The uninstall process removes the Agent Control service and executable. Configuration and other miscellaneous files may remain. Example of assets that might not be deleted as part of the uninstallation:
- Configuration files: review and remove
C:\Program Files\New Relic\newrelic-agent-controlandC:\ProgramData\New Relic\newrelic-agent-controlfolders if needed.
To uninstall Agent Control from your Windows host:
Open PowerShell with Administrator privileges.
Run the uninstall script:
PowerShell.exe -ExecutionPolicy Bypass -File "C:\Program Files\New Relic\newrelic-agent-control\uninstall.ps1"This script will:
- Stop the
newrelic-agent-controlservice - Remove the service registration
- Delete the Agent Control directories and files
- Stop the